Control
Land
Call Banquet Set-Up
Request An 8' x 2' Work Table Skirted ( 6' Will Work )
Place Work Table @ 25 Pin Control Cable Destination
Control Cable
Run From Beam Table ( Upper 25 Pin Plug on table), To
Control Position and plug into Lower 25 Pin Plug on
Controller (Ch. 1-24) Run XLR From Effects (see: Mirrors
& Effects Chapter) To Control Land.
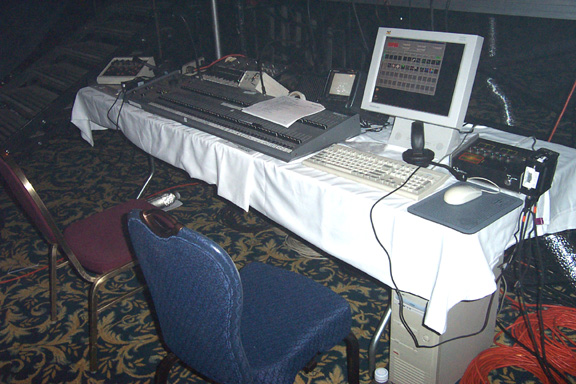
Place
On Work Table: ( Post Skirting )
Lighting Controller
Synthesizer
Cone Generator ( Small Tan Box )
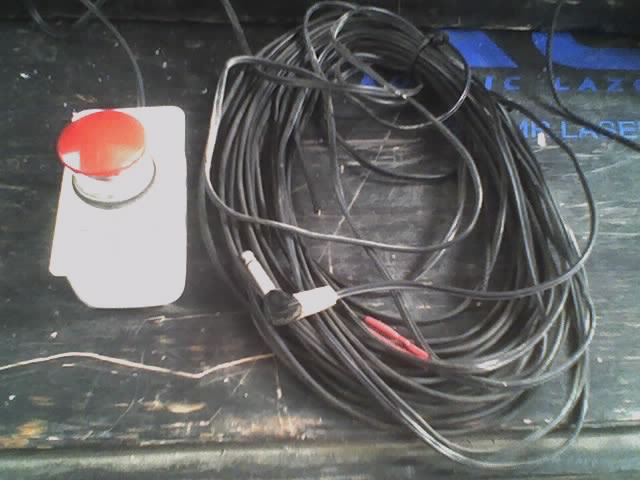
Remote Interlock Safety Switch ( Big Red Button )
SA-1 Scanner Amp
WYSE Computer Terminal + Keyboard ( If Graphics Are Used
).
Television & Wireless Camera (If Visual Obstruction
Present).
Beam Table Transmitter & Hand Held Remote Control
Lighting
Controller:
Plug
Control Cable Into Lower 25 Pin Plug On Back Of
Controller
( This Will Utilize Channels 1 - 24 / The Upper Plug = 26
- 47 ).
Synth/Sheet
Scanners:
Use 1/4 Guitar Cord To Hook Up Synth
Audio Out ( Synth ) To Synth Input On Back Of Amp
XLR Outputs On Front Panel To Sheet Scanners.
Cones:
Connect Cone XLR Cables Into Cone Generator (Sm.Tan Box).
Double Check To Make Sure Sheets Scanners Are Not Plugged
Into Cone Gen.
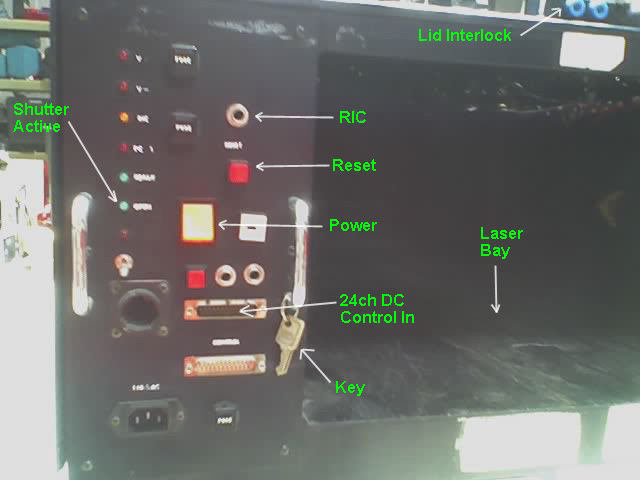
Remote
Interlock Control RIC - Safety Switch:
Plug Into Beam Table, Located Inside Table 1' In Laser
Bay On Left. Leave Red Switch At Control Land. You Might
Have To Remove A 1/4" Dummy Plug Inside Table Before
Plugging In RIC. Put Plug In A Safe Unforgettable
Location (No Jokes Please).
Beam
Table Power Up Procedure:
1) PLUG In A.C. Cord,
Located On Top Of Table
2) Remove Key Off Of
Ring Insert & Turn ON Key Switch 90 Deg.
3) Flip Main Power
Switch ON (Square Yellow Power Light Comes ON)
4) Wait 10 Sec +/-
5) Press RESET Button
( Red ), Table Is Now Active. Shutter Will Now Operate.
|